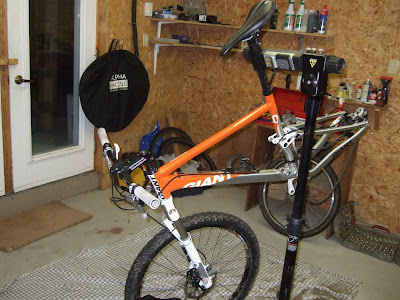
Adjusting the cones in a hub is something that is handy to know for anyone interested in performing their own maintenance and safety checks on their bicycle. These things are notorious for just coming loose for no reason at all (well really we know it is the midnight bicycle gnomes). Such hubs containing cones are known as “loose ball” hubs. Simply put it is a bunch of loose ball bearings that will come spilling out and bouncing all over the floor if you aren’t careful when you take the hub apart. Usually leaving the axle in the hub as well as their bearing grease will help to keep the ball bearings in place.
Having improperly adjusted hubs can lead to significantly shortened bearing and hub life. It can even lead to catastrophic wheel failure resulting in injury and or death. It is something that needs to be checked periodically and it is easy to do. If your cones are too loose you can tell by grasping your tire while your wheel is still on your bike. Pressure it side to side, perpendicular to rotation, and you will know if there is play in the bearing system because the wheel will have play side to side.
It is a little bit more work to check if it is too tight. Takes 30 seconds instead of 10. Remove the wheel and spin the axle with your fingers. If it feels rough it could be that your cones are improperly adjusted or some more serious service is needed. I will cover complete loose ball hub servicing in a later How-To.
Tools needed:
1-assorted cone wrenches. I have two of each size ranging from 13mm to 19mm accommodating 99% of all hubs.
2-Cassette removal tool and wrench
3-Chain whip

Step #1 – Remove the wheel you are going to be working on. In this case it is a rear wheel so I need to remove the cassette using the chain whip, cassette removal tool, and wrench.
(Check out "
How to clean your drivetrain" for an illustration of cassette removal.)

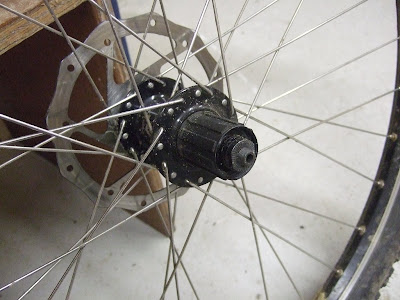
Step #2 – Remove any dust covers that might be hiding access to the cone adjustment nuts.
Comprehension – There are 2 nuts on the axle on each side of the hub. One is to adjust load on the bearing, this is known as the cone because it is also the conical inner bearing race. The other nut is to lock the cone in its place (lock nut) so that it doesn’t move on the axle. This is accomplished by tightening the two nuts against each other, locking them together and fixing them in place on the axle.
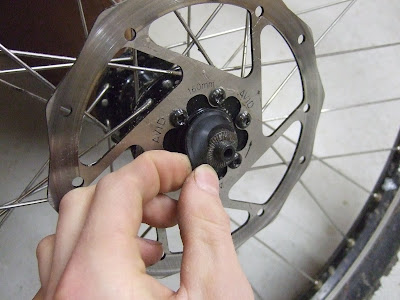

Step #3 – Usually the rear wheel is almost always the harder wheel to work on and wrap your head around. The reason being is that usually you can only access the two nuts on the non-freewheel side of the axle. The other two are usually buried in the freehub body. What this means is that you should loosen the nuts on the side you can access to in order to reach the nuts on the otherwise inaccessable freehub body side. You need to do this so that you can make sure the two nuts on the freehub body side are locked against each other.
Start by loosening the two nuts that you can reach. Hold each nut with a wrench (this is why you need skinny cone wrenches) and spin them opposite directions.
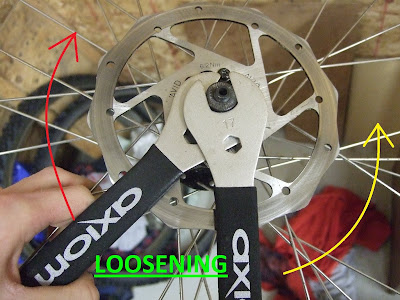
Step #4 – Remove the locking nut completely to give you lots of room to back the cone away from the bearing. Be careful, loose ball bearings may go spilling all over the floor! Usually the grease will keep them in place, but this is not always the case.

Step #5 – You will now be able to push the axle through to reveal the nuts that were buried in the freehub. Yes I said “reveal the nuts”, get over it.
*Hidden nuts.

*Push the axle through
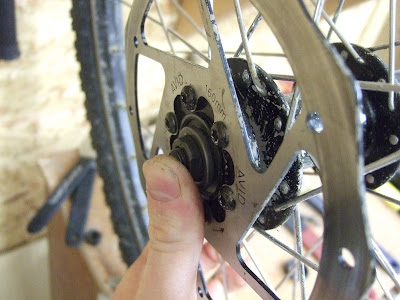
*Now you can access both nuts on the freewheel side

Step #6 – Tighten these two nuts together (freehub side) making sure you have the correct amount of axle protruding out the end (roughly 5mm). This is what sits in the dropouts of your bike. They are now locked in place and will not move on the axle. They may have already been tight, we're just making sure.

Step #7 – Gently push the axle back through the hub towards the non-freewheel side. This will once again hide the freewheel cone and locking nut but since we tightened them against each other they will stay in place. You want to snug the whole bearing system together by finger tightening the cone onto the axle on the non-freewheel side. You will, of course, have to hold the freewheel side nut in your other hand to keep the axle from spinning.

Step #8 – Since you will still be able to access the outer locking nut on the freewheel side you need to take the appropriate wrench to hold that side steady. Take another wrench to tighten the non-freewheel side cone just a tiny bit so it is just slightly tighter than finger tight. This is usually pretty close to the bearing load you need at this point, I will explain why in step #10.
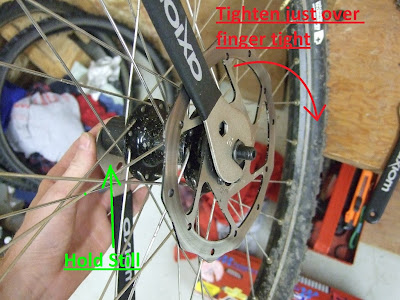
Step #9 – Thread the non-freewheel side lock nut onto the axle.

Step #10 – Lock the cone in place by tightening the lock nut against it just like you did with the freewheel side earlier. This is where it gets tricky. You need to put the correct amount of load on the bearing. If the cones are too far apart (too loose) from each other than there will be play in the axle. If your cones are too close together (too tight) there will be too much friction on the bearing and it will run rough. Either of these symptoms will result in dramatically shortened bearing life and usually complete hub failure in a loose ball system.
What’s the tricky part you say? Well remember I said to tighten the cones just past finger tight in Step #8? There was a reason for this. Whenever you tighten the final cone and lock nut assembly the cone has a tendency to pull slightly away from the hub towards the lock nut. So by putting just a touch too much load on the bearing before tightening you ensure that you have the proper load once the system is completely tightened.
Confusing? It can be for your first time working on a hub, especially if you have no clue why every time you tighten the final cone there is still play in the hub even though you thought the cones were tight to the bearing. Just takes experience and every hub will respond differently when you tighten the final cone. I have had some not move at all so the finger tightening was all I needed. I usually have to go back and adjust several times for each hub but once you have taken a few hubs apart you will find it easy to fine tune hub bearing load (which is the reason we are here in the first place).

Step #11 – Check the axle for any sort of movement and also give it a spin to make sure it moves freely and without friction. If there is play or roughness you need to loosen the lock nut again (no need to completely remove it from the axle this time) and adjust the cones (pretty much Steps #8 - #11).

Step #12 – Clean that baby up. You are a self respecting, proud mechanic so no putting a dirty cassette back on a dirty hub. Put the clean cassette and any dust covers back on. Stand back and admire your handy work and the fact that next time, it will take you 15 minutes instead of 2 hours.



 *Push the axle through


