Ok so this is a really handy thing to know. Bicycle disc brakes aren’t super complicated there are just a few extra things you need to learn to be able to service them properly yourself. This is one of the most regular services that I perform for people. There are a few reasons why:
- People are scared of working on hydraulic brakes
- People try and service their own brakes without understanding how they work
- Pretty much all mountain bikes over $1000 now come with hydraulic discs
- Disc brake calipers require regular maintenance to keep them operating properly
For this service I seriously recommend you stay within the parameters of the How-To. Brakes are one of those things that are sort of important to your health.
 In this How-To I am going to show you how to clean and lubricate your calipers, reset your caliper pistons to “zero”, and install new disc brake pads. I will be illustrating this How-To on my Anthem X1 which has Avid Elixir R disc brakes. Your brakes may vary slightly but the procedure fundamentally stays the same.
Tools needed (pictured from left to right)
-clean container for small parts so you don’t lose them
-Allen keys
-general purpose bicycle bearing grease
-plastic tire lever
-your new brake pads (model specific)
-Shimano mineral oil
-small clean rag
-small screwdriver

Step 1
Remove the wheel for the brake you will be servicing. It is easier to remove the back wheel if you shift down into your hardest cog first.

Step 2
Remove the safety clip from the end of the securing pin and then loosen any securing pin that your brake might be using. For the Elixir it is an Allen bolt, some are slotted screw heads, some brakes have no securing pin at all.
*Be careful when trying to loosen the securing pin. It is really easy to strip the head of these bolts and turn this into a really big job*
Store the pin in your clean container where you won’t lose it.

Step 3
Remove the old brake pads. For the Elixirs this is easy to do with just your fingers.
*Some brake pads like Avid Juicy’s or Hayes snap into place and do not require a securing pin. These pads are almost always harder to pull out and often require needle nose pliers. Pull the tab on the pad towards the center of the caliper to pull the backing plate of the pad away from the piston. Then pull the pad out through the caliper slot, it will snap out of place.
The reason you pull the brake pad backing plate away from brake caliper piston is because the caliper piston will have a post protruding from its center that helps to hold the pad in place. If you try to pull the pad out and it is stuck on the piston post then you could shear the post right off (been there, done that)*
Inspect the pads. Mine did not need to be changed but I have an example of some old pads that were definitely in need of replacing. As you can see all of the “meat” of the pad had been used up and it was pretty well worn down to the metal backing plate. Backing plate on brake rotor = death to rotor and not so good stopping.

These old pads are very worn. Time to replace.

Step 4
Inspect your caliper. See how on my caliper one piston sticks out quite a bit further than the other. This service will address this issue and reset both pistons back into the caliper (zero)

Step 5
Clean up your caliper.
Obviously mine isn’t too dirty but for the bad ones I like to use Finish Line Speed Degreaser. It is acetone based and evaporates without leaving any residue.
Take your small clean rag and floss it through your caliper. It will be easy since the absence of pads makes the caliper opening much larger. Doing this gets rid of all your accumulated brake dust and other crud that might be hindering the operation of your brakes.

Step 6
Expose a piston.
So here’s the deal. Your hydraulic brake lever has a plunger that pushes the brake fluid when you squeeze the brake lever. This fluid is what pushes your pistons out and clamps your pads down on your rotor.
That part should be pretty obvious. However there is also a reservoir of fluid located in the lever that can allow more brake fluid into the brake line via the flow port. This allows your caliper pistons to move further out as your pads wear but your brake lever will still feel the same when you pull it.
The good part about this is that your brake lever will (should) always have the same feel throughout the life of the pads. The bad part is that when you remove the old pads you need to manually push the pistons back into the caliper (zero) to accommodate the larger thickness of the new pads. Pushing your caliper pistons back into the caliper is easy to do because when the brake lever is not being pulled the small flow port that allows fluid to move in and out of the brake lever reservoir is open for business.
 We need to expose a piston so we can service it. To do that start by holding one piston in place with your plastic tire lever. The plastic lever is good because it is a soft material and wont damage your caliper pistons. Many pistons are made of ceramic and are easy to chip, crack, break, damage if using a metal screwdriver.
While you are holding one piston in place, you need to squeeze the brake lever slowly to bring the other piston out of the caliper. Don’t go too far because it is possible to push the piston right out of the caliper and then you will need to bleed the brakes.
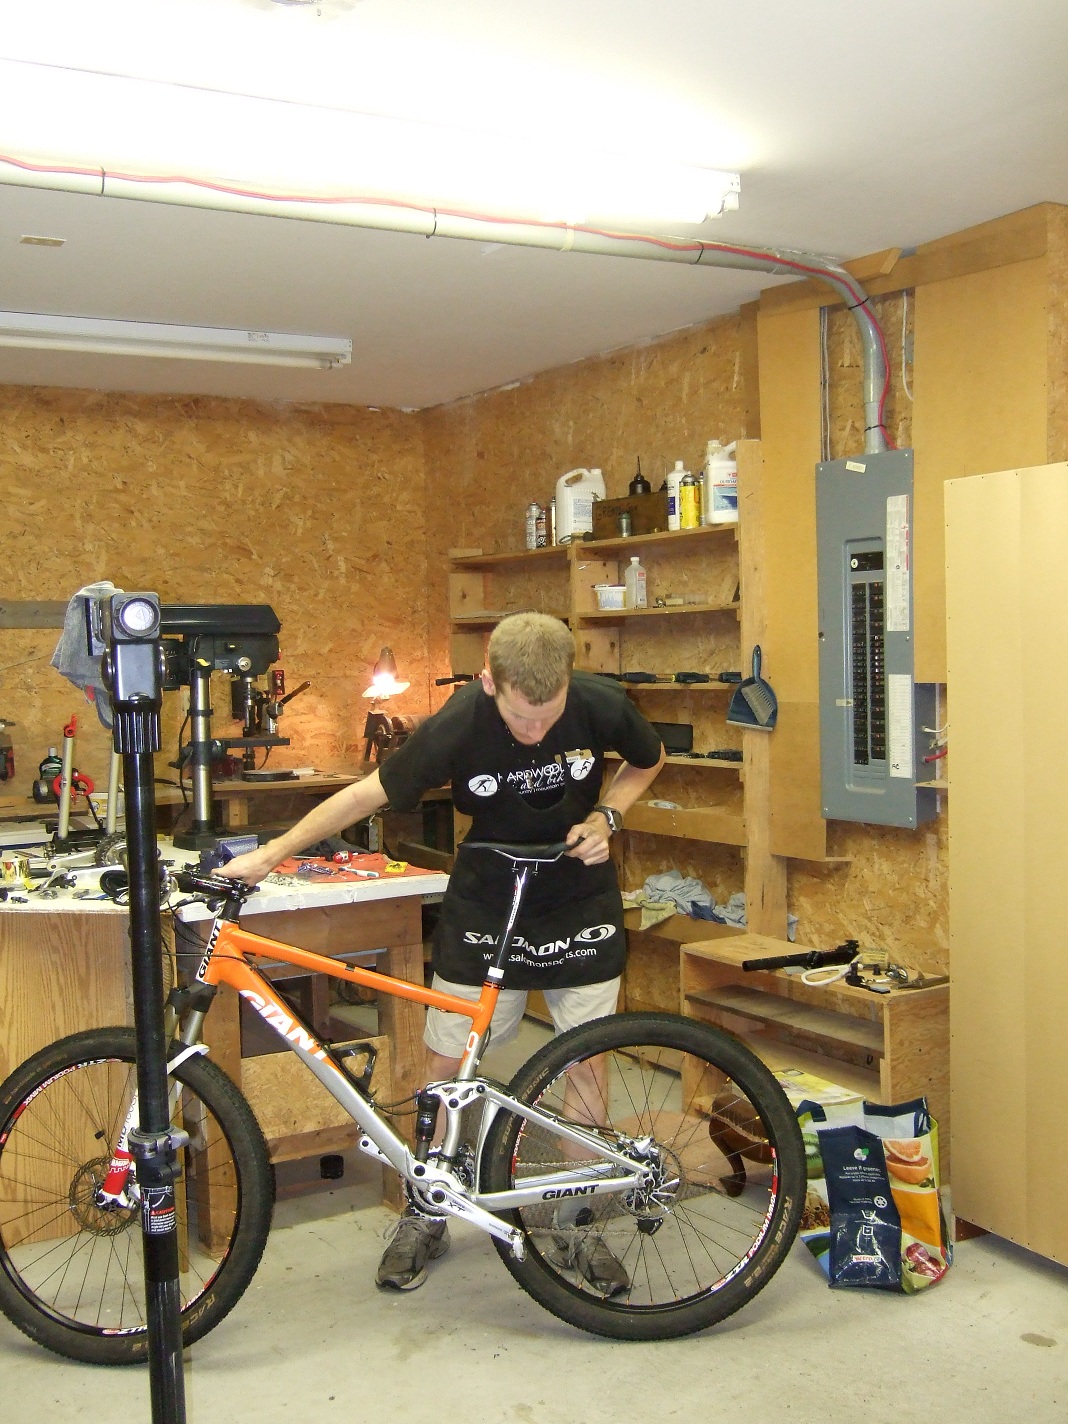
How I position myself as I do this service

Exposing a piston

Piston is now exposed

Step 7
Service the protruding piston.
Now all you gotta do is wipe the dirt from the piston walls with your clean rag and the screwdriver. Make sure the screwdriver doesn’t poke through the rag and scratch your piston walls.

Step 8
Lube the protruding piston.
I like to use Shimano mineral oil for this because it is a very neutral lubricating agent. I’m sure you could use DOT fluid for brakes that use DOT but mineral oil won’t attack your paint and is very non-toxic. I use it with great success.
Place 1-3 drops of mineral oil on the piston wall and let it bleed around the piston and cover its circumference. Using too much will just make more of a mess that you will have to clean up later before you put your pads back in.

You can now see the light oil coverage on the piston walls

Step 9
Get the piston lubed and moving freely.
You want to work the piston in and out of the caliper so that it gets well lubricated and moves relatively easily. First push the piston back in with your tire lever. Make sure to push on it squarely or it could get jammed in the caliper.
Hold the opposing piston in place like you did before and pump the brake lever to bring the same lubricated piston back out again. Repeat this 3 or 4 times to get the lubricated piston moving freely with reduced friction.
Push the piston back into the caliper

Now hold the opposite piston in place with the tire lever to bring the lubricated piston back out

Step 10
Clean up the excess mineral oil.
With the piston pushed all the way back into the caliper get your small clean rag (a fresh one if the first one you used got really dirty). Floss the rag through the caliper and get as much of the oil outta there as you can. You are now finished servicing this piston!

Step 11
Service the other piston.
Repeat steps 6 through 10 for the other piston to get it cleaned, lubricated, moving again, and pushed back into the caliper.
Now that both of your pistons have been serviced the main bulk of the work is done. On a typical caliper service it takes me about 5 minutes per brake (both pistons for front or back) to get to this point. So reading this How-To should take a lot longer than actually doing the service once you know what you are doing.
With both pistons lubed, moving freely, and pushed all the way back into the caliper we have achieved what I like to call “zeroing” the caliper.

Step 12
Prep for new pads.
To make sure that our pistons stay as centred as possible when we insert the rear wheel, you need to loosen the caliper bolts so that the caliper can move freely.

Step 13
Install pads
You need to prep the pads by installing the return spring onto one side. Next bring the other pad onto the spring and pinch them together with your fingers to make sure the spring is in the correct place and allows the pads to close fully.
Slide the pads into place in the caliper. This might take a few attempts as you will find that sometimes the return spring can get dislodged. Take your time. If your pads snap into place like Juicy or Hayes then wiggle them as you push on them, make sure they go all the way into the caliper and they snap into place or they will just rattle and fall out while you are riding. The Elixirs, Shimano, Formula, Hope, just slide into place. Push on them to make sure they are square.
Position the return spring onto one pad
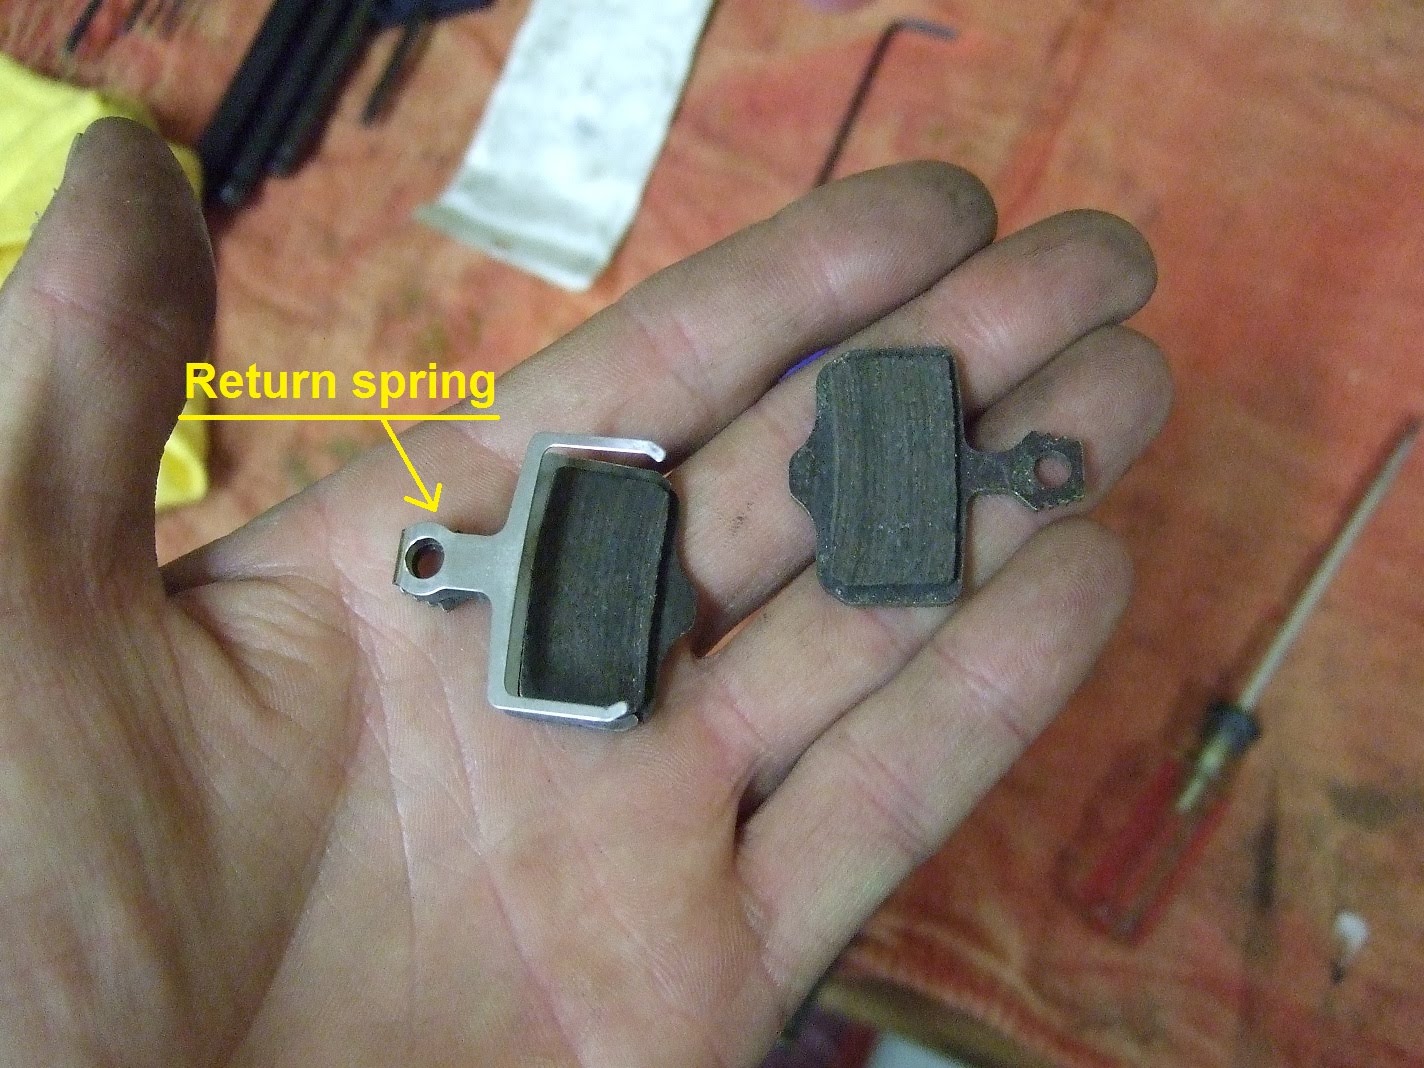
Sandwich the pads to make sure the spring is in place

Slide the sandwiched pads into the caliper

Let go of the sandwich and push them squarely into place

Step 14
Lube that securing pin!
This is the last magic piece of the secret service-your-brakes-like-a-pro service. The little securing pin is often the source of creaky brakes. The pads slide back and forth on this pin and if it is dry then the caliper will creak when you pull the lever.
Take a minuscule dab of bearing grease and roll the pin in your fingers to lightly lubricate the pin.

Just a very thin coat

Step 15
Install securing pin and pop the safety clip back onto the end of the pin. Don’t over torque this bolt. Remember what I said before, it is easy to strip the head of this bolt and that can be extra work you don’t want.

Step 16
Install your rear wheel. Do this on the ground with your body weight on the saddle to make sure your wheel is square in the dropouts.
Weight on the saddle as you close the lever to make sure the wheel is square in the frame

Step 17
Pump up your brake. Since our pistons are still pushed all the way back into our caliper we need to pump the brake lever 10 or 15 times to bring the pistons back out to where they are supposed to be and have a solid feeling lever. Remember since our caliper bolts are also loose it allows the pistons to float naturally into the position they want to be.
Step 18
Center your caliper.
Step 19
Now is the perfect time to check any other bolts for that brake. Remember you don’t always have to turn a bolt to make sure it is tight. If a bolt is already tight you don’t want to over tighten it.

That’s it you are all done! Your brakes will reward you with long life and superior performance.

Stay tuned!
Benno
Cheers for this guide.
ReplyDeleteJust what I was looking for.
Hi Benno,
ReplyDeleteI tried your method and it works but the only thing that was screwed up was I flip over the bike instead of holding on the stand as I do not have a proper stand. Ended up with all the mineral oil flowing out of the reservoir and had to send in to LBS to rebleed. Well, I learn the hard way.. Just to let those who wants to do it...Alex
hmn almost all brakes are leak proof when inverted. Only risk you run is that pumping the lever when the bike is upside down might introduce any small amounts of air from your master cylinder reservoir into your brake line.
ReplyDeleteYup I pump it when my bike was invented...as I need to push out the piston to clean them..thanks for the guide..
ReplyDeleteWhat can I do if the pistons do not move when fully inside the caliper
ReplyDeletewhen you squeeze the brake lever the pistons do not push back out?
ReplyDeleteyes, no movement in the pistons
ReplyDeleteGet new pistons/caliper :)
ReplyDeletebreaks on my giant terrago have become so soft with very little breaking power, makes for a scarey ride at times. Pads dont seem to be that worn but will replace if needed. did swap them from front to bck but to no help. So any ideas? The floor is yours.
ReplyDeleteSo there very likely scenario is that you have air in the system. Unlike liquid, it is possible to compress air. So when you squeeze the lever you will just be compressing the air in your line and you won't have much clamping power. I am going to post a brake bleed how-to in the next couple weeks so look out for that!
ReplyDeleteBenno
I got alarm bells when you recommend using mineral oil lubricant. I don't know about bike calipers, but in motor vehicles you NEVER get mineral oil anywhere near the brakes - it attacks the rubber compounds used in many critical parts (e.g. seals, boots etc). The only thing that gets near cleaned and reconditioned brakes is brake fluid - nothing else for any purpose. My apologies in advance if bicycle brakes are different
ReplyDeleteI appreciate the concern. However, this is not drug store mineral oil. It has been specifically developed by Shimano for hydraulic disk brakes.
ReplyDeleteI'm searching the net with regards to hydraulics repairs and I'm glad I found this blog. Thanks for sharing! It was great.
ReplyDeleteThis is just what I need but I also question the use of mineral oil on Avid brakes. Shimano oil is designed for Shimano brakes which are designed for mineral oil and for seals that are designed for mineral oil. I'm picking up some 3-in-1 Silicon spray that supposedly is good for rubber.
ReplyDeleteAlan
Yes there are many different types of rubber out there and some can be very sensitive. I can tell you that mineral oil is very inert when it comes to reacting with rubber. Not only does mineral oil not react with the rubber, it also doesn't eat the paint on your bike/calipers like DOT fluid will.
ReplyDeleteSilicon spray may have a reaction, after all DOT 5 is silicon based and not recommended for brakes that use 3,4,5.1 fluid.
Also you might find that "spray" can get messy. I like little droppers for this task.
ReplyDeleteI'm still looking!
ReplyDeleteCheck out these links: http://www.crcindustries.com/ei/content/prod_detail.aspx?S=Y&PN=05351
http://cdn.sram.com/cdn/farfuture/BV61x9rqRNw481ywvZFqLJLQQmlubAa-jvPFGZnOAOU/mtime:1330362893/sites/default/files/techdocs/e1_e3_service_manual_rev_b.pdf
This is a great article, thanks for the advice. I have bled my system a couple of times now and serviced my pistons, but one of them is still sticking. When I squeeze the brake lever the piston comes out fine but will not retract at all when the lever is released. The calipers are fairly new and I have tried everything I can think of to fix this. The LBS where I live is sub par and only handles road bikes so I'm on my own. Thanks.
ReplyDeleteWhich model of brake are you dealing with? Have you tried pushing the piston all the way out and inspecting the o-rings and dust shields to make sure they are seated properly? Could be a manufacturing tolerance problem too, a warranty claim.
ReplyDeleteSomewhere in the system there is too much friction for that one piston to return.
They are Avid Elixirs. I have taken out the pistons to clean and lube them, but I have not inspected the o-rings and dust shields. I will give that a shot. Thanks for the tips!
ReplyDeleteAre the original Avid Exlir R pads metallic or ceramic? Thanks.
ReplyDeleteHey Joe,
ReplyDeletethere are two possibilities here. One is that invariably one piston will move before the other. So many times when you "zero" the caliper you have to babysit the pistons as you are pumping them back out. Often one side will push out much further than the other. You don't really want that to happen, you want both pistons out relatively the same amount. So you can hold the piston that moves first against the rotor to force the other piston to come out and match the extension of the other piston, if that makes sense.
Scenario 2.........Avid is definitely not renowned for their quality control. Sometimes the tolerances just aren't adequate for proper function. Sadly replacement is usually the only option in this case.
As for Avid stock pad compound.....I believe most come with sintered metallic. Stock Avid pads are some of the worst pads I have ever used. They build up a glazing and become very juttery and loud. Swap em out for Jagwire "Mountain Pro" pads. They are the best I have ever used, light weight, and cheap!
Hi Benno,
ReplyDeleteThanks for your excellent how-to. My misbehaving Avid Elixir 5's are now operating sweetly again and for the first time I have a much better understanding how the master cylinder and caliper pistons operate, specifically how it is the piston seals retracting the pistons and not the pad spring as I had wrongly assumed...
Regards,
Nosmo.
Great article!. Last weekend I came home early from a ride due to my rear Elixir seizing up after a jump gone wrong... Google brought up this article and I followed the advice here in spreading the pads and then lubricating the pistons. I only had Dot3 fluid on hand and I used a toothpick as a dropper to carefully lubricate the pistons, which worked well. I have to say my brakes are now working better than they ever have (even when I got the bike new).
ReplyDeleteGlad to hear you were able to get it fixed. Hopefully your bike was the only injury after your "jump gone wrong" lol. In a pinch I have used all sorts of stuff to lubricate calipers. I would much rather risk long term seal degradation than have a stuck piston. In the case of DOT3 with Avid, really the only risk you run is the fluid eating some of the paint on your caliper. Sounds like you were careful though. Enjoy your brakes.
DeleteBenno
I used shimano bearing grease to lube the pistons on avid juicy brakes (DOT 5.1 brakes) for one of the calipers. For the other one I've used shimano mineral oil. This is the stuff that I had lying around
ReplyDeleteI've read afterwards that you can only use same type of lube as brakes is using. Will the small amount of mineral oil/grease that has entered the system compromise the brakes/seals?
Can I throw them away, can they still be saved?
You'll be okay, DOT seals can handle it. Bearing grease is not ideal as it is pretty thick and doesnt penetrate quite as far. There could be some long term problems with seals breaking down with continual exposure to different lubes but I'm sure they'll be fine this time.
DeleteHi Benno,
ReplyDeleteI just picked up an eBay purchase of a Dec 2009 'Spech' Hardrock Pro low milage with Tektro Auriga Comp hydraulic brakes. The front lever and piston were completely out. I placed the piston ball back into the socket and it stays there but the lever will not move and I don't want to force it. Do I need to bleed or is it more serious? Thanks for sharing your knowledge,
Bernard
Funny I actually have a lot of experience with that brake, for the very reasons that you are describing. Okay so there are a few things to consider....
DeleteTry and bear with me here, I will try to explain it in words and if it is too confusing I will draw some pictures and stuff and post them up for you.
The fact that the push rod ( the piston is the nylon bit inside the lever that moves fluid ) popped out of the socket means that the lever was forced open past its operating range. Usually this is the result of a crash.
The push rod ball is held in place on the piston socket by a flat washer and the washer is held in place by a small snap ring. Sometimes the pushrod ball is pulled through the washer, warping it. Other times the ball rips the washer and snap ring right out.
You need to look at your brake, near where the piston and push rod meet and see if the washer and snap ring are still there. If they are then you need to remove the snap ring with impossibly tiny snap ring pliers (I modified a pair and made some long snap ring arms out of some wood nails). Then the washer will fall right out. You either need to buy a new washer or flatten the old one so that it looks like a normal flat washer again.
Now comes the painful process of putting the snap ring, washer, and pushrod back into the lever body.
First you need to separate the brake lever blade from the push rod so that you have room to get your snap ring pliers in there. I actually had a special way of doing this because they are similar in design to some of the crappier Avid Juicy brakes and I had to fix those allll the time.
The problem is that you need to push on the push rod with quite a bit of force into the lever body while simultaneously trying to seat that stupid little snap ring into place.
The easiest way is to open up the system, it will require a re-bleed after though. I can do a write up on that if you want, bleeding brakes is actually really easy!
The trick I used was I would put the lever body in a vice (wrap it in a rag so it doesn't get scratched). Then I would take the reservoir cap off of the brake lever body. If you look at my crappy little drawing in this how-to article you can see what I'm talking about. With the reservoir cap off you can dump out any small amount of brake fluid that may be in there. Inside the reservoir will be a small flow port, less that a mm in diameter. Now find yourself a safety pin, and push the springy piston down with the push rod as far as you can. Now stick the safety pin into the flow port and slowly release the pressure on the push rod. The safety pin should keep the hydralic pison compressed.
Now that the piston is held in a compressed state it will be waaaaaaay easier to get that washer and snap ring back into position on the lever body, they are used to keep the push rod and ultimately the brake lever blade, from flopping all over the place when you aren't using your brakes.
Now you can remove that safety pin from the flow port and put everything else back together. Phew!
I understand this is probably confusing to read. It is pretty simple once you can identify all the parts. Please just take your time and post up questions and send me pics if you need to and we'll work through it.
DeleteAlso just so that you know those (and most) hydraulic brakes are painfully simple in design. Don't be afraid to completely disassemble the lever, I'll show you how to put it all back together. There are very few parts to the lever. Then we'll just bleed the system when you're done.
DeleteBenno,
ReplyDeleteThanks so much for your help. Perhaps, with your past success at this micro trickery, you should have been an ophthalmic surgeon! Because of your clear directions, I am looking forward to tackling the job this weekend - though I'm not confident. My snap ring is in place and I think I'll get it out with a combination of tweezers and skinny long nosed pliers. My washer is probably not present because the socket has protruded, slightly, thru the snap ring; I think this is what allows me to 'click' the push rod ball into the socket. I assume I will need a new washer. I presume the push rod needs to come out from the hand lever, to get the washer on to the 'outer' side of the ball - is this correct? If so, does the push rod have an allen key 'socket' bored into its centre (on the opposite side to the ball)? My push rod looks worn, so I may have to use pliers to remove it, without injuring the ball. Whew ....... and this is just getting it out! To "open up" the brake system, do I only remove the resevoir cap or do I also have to open the bleed point?
Thanks, Bernard
Your observations are promising! lol. You seem to be asking the right questions so I'm sure we'll be able to get through this haha.
DeleteOkay so if there is no washer present you will need to get one. It will sit just behind the snap ring and be slightly larger in diameter than the piston. When you remove the snap ring you will see where the washer lives just underneath.
The center hole of the washer needs to be large enough to accommodate the push rod, for as you correctly ascertained it will be located between the ball and the where the pushrod connects to the brake lever blade. Keep in mind the pushrod moves around as it changes angles, so your washer hole needs to be large enough to accommodate this.
Don't be afraid to sacrifice some pliers and grind em down to fit the snap ring. If I recall the snapring has quite a bit of spring to it so not the easiest thing to deal with.
Yes your push rod has an allen key socket on the end. That is actually how you dial in or out your brake levers for riders with small or large hands.
To make your life easier you can detach the whole brake lever from your brake hose. You will see a threaded bolt where your hose passes through right at the lever. You can losen that all the way out and slide it down the hose out of the way. Now the brake line should pull straight out of the lever, sometimes with a bit of force. You will see a brass "olive" and small brass fitting jammed in the end of the hose. That is what forms the seal with the lever. They can be re-used when you go to re-attach the hose.
You don't really have to worry about the bleed port. You can just open up the reservoir cap. Look on the cap, it should say which fluid your brake uses. If it is D.O.T then the fluid is very toxic and strips paint, so soak it up with a rag and avoid contact. If it is mineral oil then you only have to worry about making a mess on your floor.
Also keep in mind the last time I saw this Tektro brake was about 3 years ago. So I am going mostly by my memory of Juicy brakes. Don't be too surprised if yours is not exactly as I have described. I am pretty sure it should be pretty close. Only thing I am not 100% sure of is if you can hold the piston in place with a pin through the flow port.
DeleteAlso don't be afraid to pop the piston right out and check it out for any damage. When it's out you can look down the bore where the piston lives and look for any scratches.
Hi Benno. I recently bought a used gt a avalanche with auriga comp brakes. I managed to bleed the none working back brake, but it is squealing badly. Maybe the pads got contaminated or just need replacing. It struggles to brake as well... But that's not the problem. My front lever got dislodged and the washer that sits behind the reach pin ball is now located outside the 'catch washer', if I could call it that. Mineral oil also started leaking from the cylinder/piston. Is there a way I can fix this leak? And how do I remove the catch washer to get the push rod back so the lever doesn't swing around?
DeleteAh yes these auriga's really are failing in very similar ways for everybody. First the squeeling brake sounds like contaminated pads. Put new pads in and clean your rotor with alcohol. Jagwire makes some good pads, they are cheap too. I buy the ones with gold backing plates.
DeleteAs for the washer pushing through the snap ring. I have seen this. You can either get a new washer or hammer the old one flat since it is probably warped. You will need to remove the snap ring in order to put the washer back in and then lock it in place with the snap ring. You may have over extended the piston and lost some fluid. It could need a bleed.
Hi benno I hv elixier 9 brake set. Is it possible to replace the piston caliper. I shud hv read this before trying to replace my pads! Tawa
ReplyDeleteHey Peter,
Deleteyou can replace any part of the Elixir caliper. If you go to your local bike shop they will be able to look up part numbers for you and order the parts for you.
What is wrong with your caliper?
I hv damaged one of the ceramic pistons.... Using a screwdriver. Lesson learnt! Yes contacted my LBS & they can get me a new set. Thx like yr blog. Hv u done one on setting/adjusting the front derailier cheers
ReplyDeleteGlad that your LBS can help you out. I have never been a huge fan of ceramic pistons. I find they don't last as long or operate as smoothly. I've even cracked one in half before.
DeleteI haven't done a front derailleur DIY yet. I sold my Anthem and bought a new bike. I take delivery of that in April so I will do some more maintenance articles when I get the new bike!
Hi there,
ReplyDeleteFirst of all, great blog post.
Secondly, In a very short period of time I will bleed my Avid Elixir 5 brakes for the first time. Doing things right I also want to clean (with break cleaner) and lube the caliper as you have explained in this post. I also have a question regarding the lube part. Which of the following lubricants that I have on the shelf are best to be used (or none of them):
- Kroon teflon spray
- Kroon Handy Oil (free of acid)
- Silicon spray
- Brunox (Rockshox) fork deo
Thanks in advance
Hey, thanks for the feedback.
DeleteIn reality your pistons don't really require much lubricant since they are constantly bathed in hydraulic fluid. The service described here is a good way to clean up dusty/dirty pistons and help to hydrate the piston boot or seal (rubber). If you are bleeding your brakes then don't be afraid to pop the pisons right out of the caliper. A lot of the time you can pull them out with just a little bit of a tug from either your fingers or a small pair of needle nose pliers. That way you can even remove the piston boots and clean them all up.
Make sure when you push the pistons back into the caliper that they are square and go in easily. Heck you can even disconnect the bolts that hold the 2 pieces of the caliper body and separate the caliper for easier access (be careful not to loose the tiny rubber o-ring seal for the bridge port that provides fluid to both sides of the caliper).
Now DOT fluid will eat any paint so best not to get any fluid on any external part of the brake. Only the internals which are designed to handle it.
Before you put it all back together give your pistons and the inside of your piston seals a coat of hydraulic bleed fluid. Then she'll be good to go. It is wise to even do this every year to keep everything fresh.
Hope it goes well for you. Let me know if you run into a snag.
Benno
Hi Benno, thank you for the quick reply.
DeleteYou are saying that I can completely remove the pistons from the caliper. I looked into the Avid service manual and in there an air compressor is used to remove the pistons. Do I need compressed air? If so can I use a bicycle pump with air bed nozzle for this. Or can I pull the break lever without brake pads to let the pistons come out of the caliper, to be able pull them out by hand or plier?
Can I reuse all the seals/O-rings? I am thinking to replace the brakes with Shimano breaks in the near future, so I don't want to spent to much on these anymore unless it would be the only way.
Further more, what is best used to catch any dot 5.1 oil that will come out of the brake. Can it be a plastic tray or something
Last question, when pushing the pistons out of the caliper using the break lever. Should I put something small between the pistons (for example An old plastic (credit)card) to be able to pull the pistons back when needed.
Sorry for being a noob on this.
Kind regards,
Frans
Hi there,
DeleteTwo additional questions. When I want to separate the caliper body, can I leave the break hose connected to one side of caliper body, or is best to disconnect the caliper completely?
And when I want to bleed afterwards (when oil has leaked out), what amount of DOT 5.1 oil do I need? Will it be more than used for a standard bleed? I have 100ml of DOT 5.1 in stock.
Thanks again in advance!
Air compressor works too. Pretty much the pistons are just pucks and nothing is there to stop them from being pushed all the way out. There is only enough room in the slot to push one out at a time.
DeleteYou can certainly reuse all of the seals as long as they are in good shape, not cracked or broken. Another good reason to take it apart, it allows you to inspect everything. If they do need to be replaced you are talking a very small amount of money, like a few dollars.
You can use a plastic tray or bags to catch DOT fluid. A handy thing to have is a funnel so you can pour it back into a container to dispose of it properly (like a hazardous waste depot). Since I bleed to brakes/clutch on my car fairly frequently I always have a hazardous waste container on hand.
If you are worried about your pistons getting stuck together if they both get pushed out at the same time then by all means stick something between them. I've never had that happen though and if your careful you can just pry them apart with something really thin. If you only allow one piston to be pushed out (hold the other piston in place with a tire lever or something) then you can push one piston all the way out. Be ready to catch it though and also have your tray/bag set up to catch any fluid as once the piston pops out the system is now fully open. The other pison will have to pulled/blown out.
Honestly when I am taking a caliper completely apart I just separate it from the line, pump all the fluid out of the line so it's not dripping for like 20min, and dump as much fluid out of the caliper as I can. Now the caliper isn't attached to the bike/brake line which means you can take it over to a workbench to do your service on it. Much nicer working on a small caliper on a bench instead of suspended in the air.
That is the long version of bleeding a brake lol. If you just wanna do a fluid flush then don't worry about it. Only thing is you have to make sure you have a bleed block, or with some new-ish brake pads leave everything on the bike, including the wheel/rotor, and bleed it like that making sure not to get any fluid on your pads. That way your pistons are properly spaced apart when you do the bleed.
My one piece of bleed advice I will give is to make sure you pump the lever as you are pushing the fluid through the line. This really helps to get rid of any air in the system. It was the one bit of advice that made my bleeds perfect. It was never taught to me by any of the official service manuals. I think I picked it up off the weightweenies forum from a member there.
It does take more fluid to bleed a system that is completely dry. However one advantage is that any fluid being pushed through the system will be clean and new so you can just reuse it. A bleed from dry should be done 3 or 4 times to make sure all the air bubbles are out of the little nooks and crannies.
DeleteHi Benno,
DeleteThank you for all the details. I just cleaned the calipers as decribed on this page. Today I will bleed the brakes. I have created my own bleedblok using a couple of plastic cards (old credit cards or something like that).
About puling the lever while bleeding the hose. Should I pump (pull/release) the lever a couple of times while pushing fluid through the hose, or should I pull and secure the lever to the handlebar only one time (the same way when pressurising the caliper).
Hey, sorry for the late reply. Have you bled your brakes yet?
DeleteAnd I meant to pump the brakes a few times while pushing the fluid through. That way it forces air bubbles out of the brake lever. So squeeze, release. Repeat.
Hello, I am a newbie rider and using diac brake the first time. My bjke is not more than a month age. i found the front wheel brake rubbing the rotar last night, and removed the brake out. Found that seems only the left piston is moving, so i held the left piston firm and press the brake lever, then the right poston moves out. Then i try to push back both piston to its home position but they just can not. When i push in the left piston, the right piston moves out and vice versa. Finally I inserted back the pads and increase the gap by using a screw driver.
ReplyDeleteFinally the front wheel is installed back, but i found there is no space identified by eyeball between the pads and the rotar now, and the rotar is rubbing the pads continously. What can i do to improve the situation?
Is it possible to push both pistons back in at the same time? Sounds like you pumped too much fluid into your brake line and caliper. If you push both pistons in at the same time then it should push that extra fluid back into the brake lever reservoir.
DeleteIf you can't push the pistons back in, or if they still rub then there is a chance that you have too much fluid in your brake. Try gently opening the fluid port on the caliper all the while squeezing the brake lever a little bit so that there is pressure in the line (this is so that when you upen the fluid port that you don't suck air into the caliper).
Then with the port open squeeze the lever a little bit so that a few drops of fluid come out. Still holding the lever (so you don't suck in air) close the the fluid port. You should now be able to push your pistons further into the caliper :-)
First, Thank you very much, you saved my brake. The first method is not working, When i pushed them in house, they will comes out about 2mm again immediately.
DeleteThen I tried the 2nd method, it just work. After installed the wheel back, there is about 2mm gap between pad and rotar now.
I'm glad to hear that method worked for you. You are on your way to becoming a disc brake expert :-)
DeleteBenno
Hi I have avid elixer 3 on my bike and recently the rear brake is binding on the rotor, I've dropped the wheel out and gave it a spin and it spinned freely so its definetly a brake issue there is zero daylight between both pads and rotor. I have tried re centreing the caliper,and have removed wheel and brake pads, pumped both pistons out and inspected cleaned and they both seem fine, only to put wheel back on and its still binding,any suggestions?
ReplyDeleteSorry I am so late replying Mark. If you read the conversation just above your question (posted by supersaian wu) then you can try the same trick. It sounds like your pistons are stuck too far out. Also make sure you are centered properly. See my tutorial - How To: Center your caliper.
DeleteHi Benno, thanks for the reply, I've still got issues with brakes, what is actually happening is when the weather is hot about 20c in UK, my brakes are locking it would appear in hot conditions, I've bled a little fluid from both caliper and lever but it only temporary fixes it, and the brakes lock on agsin , like I said only when the weather is hot, once the bike is in the shade the brakes free them selves and are fine! I've read that it could be air in the system expanding hence the pads locking on the rotor, would you suggest a full bleed? Thanks mark
DeleteHi Benno
ReplyDeleteI just fixed that very same problem, on the very same brake on my 2010 Focus
:)
Thanks a million times
Ok I have a set of Elixir 3 on my Focus and the rear is locked up. I have done the maintenance and to no avail as soon as I activate the rear brake the pads close snug on the disk create heat expand the fluid and lock tight on the disk. Any reccomendations?
ReplyDeleteDont think Benno looks at this now but it Sounds like air to me, I did a full bleed on mine and fixed the locking wheel, all though I did notice on a hot day that left brake lever had virtual travel when applying the brake, so definetly temperature related and air bubbles expanding,as avids have no accessible mater cylinder for fluid to expand too,hence the locking pads and full feeling levers when they overheat.
DeleteSo as I posted above my rear caliper is seized. I pulled the caliper apart today and one piston is seized and the other side is creating all the stopping power. So should I just tear it down and re build it or is it cheaper to buy a new caliper? These are on my focus Blackforest Elixir 3 as posted above in my previous message.
ReplyDeleteHi Benno,
ReplyDeleteDo you have any experience with Giant MPH3 brakes? I'm trying to remove the pistons from the calipers. I can't seem to force the piston all the way out. There are two holes on the face of each piston, I was wondering if the holes are used to unscrew the piston from a fixed base with a stop (that normally moves with the piston), it seems odd but they seem solid when almost fully exposed. Thanks
Thanks Very well explained and photographed!
ReplyDeleteI messed up my security pins as they were very tight and I spent a lot of time taking them out. I can't find a place to order them from any help would be much appreciated. Thanks PM me at Jfbourne1@gmail.com
ReplyDeleteWhich model of brake do you have?
DeleteA car's braking system is one of the most important components in your driving experience, as it's the only thing keeping you from smashing into that bus full of nuns on your spirited run to the grocery store. It's a fairly simple hydraulic system that allows the force applied at the pedal to be translated to clamping force at the wheel. When a brake pad wears down on a rotor, it will often make a squeaking sound when applied. This is an audible safety measure to make sure that the driver knows to change the brakes soon. Unfortunately, some pads don't do this particularly well, so newer cars have brake pad wear sensors installed as part of their system, alerting the driver on the dash that the pads needs replacement.
ReplyDeleteSource: Brake Caliper Set
Hi Benno,
ReplyDeleteWhen servicing caliper pistons, one piston fell out. I put it back and bleeded the brakes, repeatedly, but the brake lever has not firmed up completely and shows very little resistance as if there was still air in the system. There is no obvious leakage of the fluid after pressing brake levers and pads are not contaminated by mineral oil, suggesting that pistons/O-rings are okay. I took the caliper apart, cleaned, O-rings seem intact, put everything back, and repeatedly bleeded. No improvement, I am afraid. Not sure what to do, a bit disappointed with Tektro Draco Pro. New O-rings are not available in the UK.
I have a similar problem. Did you get a solution to your problem ?
ReplyDeleteWhat is the proper torque no the securing pin (bolt) that holds the disk brake pads?
ReplyDeleteThanks now after buying best brake pads in Dubai I will change pads myself with the help of your article.
ReplyDeleteThe brake lining is what makes your car slow or stop. Indeed, the linings rub the brake discs or drums when you generate the braking action. Through this, the kinetic energy of your car is transformed into calorific energy (action combustion). The linings thus allow the contact between the pads and the brake discs not to be too violent. You can find more details in Auto care labs
ReplyDeleteThis is a wonderful inspiring article. I am practically satisfied with your great work. You have really put together extremely helpful data. Keep it up... Are you planning to buy a new car? For this, you need to sell your old car for good cashback. top cash for cars brisbane provides the best cash for car brisbane services in Australia, and car wreckers Brisbane, that will help you to get a handsome amount for the new car.
ReplyDeleteThis guide on servicing hydraulic calipers is incredibly informative! It's great to see such detailed steps and useful tips for maintaining one of the most critical components of a vehicle's braking system. Regular maintenance is key to ensuring safety and longevity. For those looking to part ways with their older vehicles, considering scrap car removal Brisbane services can be a smart move to keep your garage clutter-free.
ReplyDeleteGreat guide on servicing hydraulic calipers! Proper maintenance is crucial for safety and performance. I always recommend checking for any leaks during the caliper service and ensuring the pads are correctly aligned for optimal braking. For those looking for comprehensive resources and parts, fleetsworld has a fantastic selection of tools and guides to help you through the process. Keep up the great work.
ReplyDeleteThanks for sharing these tips on servicing hydraulic calipers and changing pads! Maintenance like this is so essential for keeping things running smoothly. With all the time I’m spending studying for my GRE, I sometimes wish I could have someone take my online gre exam for me so I could focus on learning more practical skills like this.
ReplyDeleteThanks for the detailed guide on servicing hydraulic calipers and changing pads! It's such an important skill for anyone who wants to keep their vehicle in top shape. With my HESI exam coming up, I sometimes feel overwhelmed and wish I could just pay someone to do my hesi exam so I could focus more on learning practical skills like these.
ReplyDeleteThis guide on servicing hydraulic calipers is incredibly informative and helpful for DIY enthusiasts. Maintaining brake systems can be challenging, but clear instructions like these make the process much more approachable. For anyone considering upgrading their car after repairs, getting the best cash for cars can make all the difference in funding that next project.
ReplyDeleteThanks for the advice on how to service hydraulic calipers and replace pads! It's such a big help in keeping everything going smoothly. With all the studying I'm doing for my exams, I often wish I had someone who could pay someone to take my online exam for me so that I could be learning more practical things like this.
ReplyDeleteThis is an incredibly helpful, step-by-step guide that demystifies a maintenance task many cyclists avoid. Your emphasis on carefully cleaning the calipers and pistons before re-lubricating is spot on; restoring free piston movement is often the key to getting that perfect brake feel back, and using a plastic tire lever to prevent ceramic piston damage is a pro tip that deserves highlighting. The explanation of how fluid compensation works in the lever reservoir clarifies why we need to "zero" the pistons for new pads, translating technical mechanics into clear, actionable steps for the DIYer, which is exactly the kind of comprehensive asset maintenance knowledge we value in BGD33.
ReplyDeleteServicing hydraulic calipers is an art – when done right, it makes your brakes feel brand new. Eco liv is providing best deals and discount codes on electronics, pets, jewellery, travel, gifts, clothing & apparel and more. Safety + performance = true riding confidence!
ReplyDeleteI recently came across Alloy Refresh while looking for a reliable company offering Caliper Refurb Wolverhampton services, and I must say they’re outstanding. The team is friendly, professional, and clearly know their stuff. My calipers look brand new again, with a perfect finish that really lifts the car’s overall look. What impressed me most was their attention to detail and quick turnaround. It’s great to find a local business that combines quality with affordability. I’d definitely recommend Alloy Refresh to anyone wanting to upgrade or restore their brake calipers. Excellent work and brilliant customer service all round!
ReplyDeleteThe effects of this practice are multifaceted. On one hand, it highlights the increasing pressure and expectations placed on learners in professional and academic settings. On the other hand, it challenges the very essence of integrity. True education demands active engagement, critical thinking, and accountability—qualities that cannot be transferred or outsourced. Interestingly, just like in the world of Trusted brands providing fashion, clothes, shopping, shoes, makeup, skin, beauty, and more, where authenticity, quality, and personal choice define value, the same principles apply in education: genuine effort, personal involvement, and ethical behavior create real, lasting results.
ReplyDeleteThis guide on servicing hydraulic calipers and changing pads is extremely practical and easy to follow.Trusted Advisor offers expert insights and honest recommendations across Home & Garden, Kitchen, Health & Lifestyle, Tech, Baby & Kid, Style, and Gifts, providing readers with reliable guidance while also learning essential maintenance skills. It provides clear step-by-step instructions that can help both beginners and experienced mechanics perform maintenance safely and efficiently. A very useful resource for anyone looking to keep their braking system in top condition.
ReplyDeleteGreat read! Really appreciate the insights shared here. If anyone is also looking for furniture tips, check out this helpful guide: https://billsmattressandfurniture.com/simple-project-sink-review-a-game-changing-blue-pedestal
ReplyDeleteThis detailed guide on servicing bicycle hydraulic brakes clearly explains maintenance steps and safety considerations. Learning such technical procedures shows how important practical understanding is, and students can also use exam help services to better grasp complex subjects and improve performance.
ReplyDelete